Easy Stuffed Animal Zoo Tutorial
Tutorial for an Easy Circular Stuffed Animal Zoo
I’ve been blessed with a daughter who loves stuffed animals—Webkinz specifically. She became a super-fan of these stuffed animals long after the Webkinz frenzy and gained a large collection by searching out sales and hitting the weekly garage sale. 
The problem with any large collection of anything is that it needs to be stored or displayed. There’s lots of stuffed animal storage solutions from hammocks, to hanging chains that animals are clipped to. Pinterest is chock full of ideas, and thanks to our pinning obsession, you can find post after post of toy storage ideas. I even found one with 44 ideas! Makes me tired.
We saw some great ideas for stuffed animal zoos using bungee cords for the bars, and some that were designed to fit snuggly in a corner. Some stuffed animal zoos had cute “ZOO” or “Kaitlyn’s Zoo” signs on top. There are so many options, and so many talented builders. In the past, I’ve been intimidated by all the artistic ideas to the point where I have abandoned a build idea because I didn’t feel up to the task. Please don’t do that! 
I needed something that could be built in a weekend, was durable, and would add style to her room. I loved the cute signs, but didn’t have a Cricut Die Cut Machine at the time and didn’t want to free hand the lettering. So, after talking my ideas over with Kevin, we settled on a round, solid wood zoo with dowel bars.
We couldn’t find a solid tutorial, so we decided that we would try to figure it out ourselves and I’m so glad we did. It turned into an incredibly fun weekend spent together in the garage, cutting and painting wood and catching up.
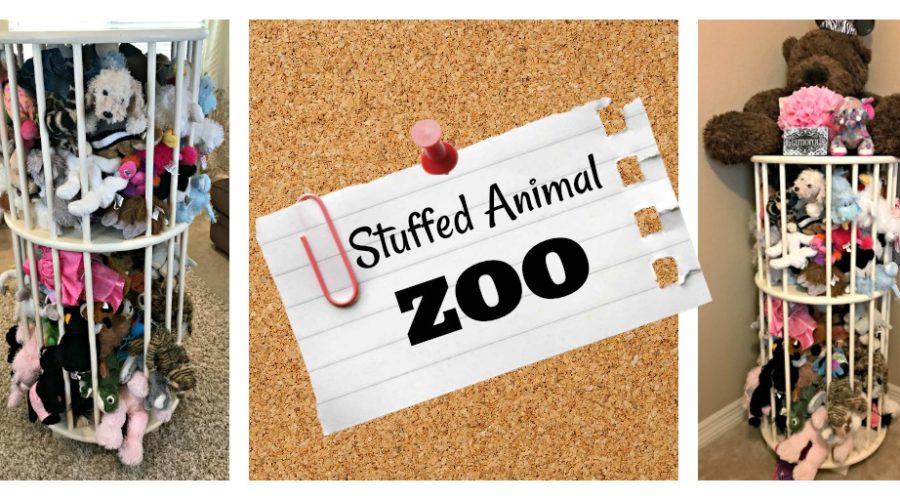
Check out this tutorial on building a large Stuffed Animal Zoo Click To TweetThis is a very large zoo, measuring 52 inches tall by 25 inches wide. We “cheated” by purchasing 25” round wood circles at Home Depot, and 18- 1” diameter dowels. The only thing we built was the base, using 2×4’s. Once the base was built, we marked the spots for our dowels and started drilling. Although we placed the dowels evenly around the circle, we did leave an unusually large gap between two dowels as an opening to the zoo. This made it easier to place larger animals in the zoo and kept our daughter from getting her hand stuck as she pulled animals in and out.
This was mostly a drilling project. Once the holes were drilled, we glued the dowels in place, and put it all together. Then we had a great time painting it.
Looking back, I’m really glad that we didn’t put a sign on top. As you can see, our daughter found a perfect perch for her huge stuffed bear and Mickey Mouse ears hat.
I enjoyed re-living building the stuffed animal zoo. I’d love to hear what project you enjoyed building. Let us know in the comments below.


