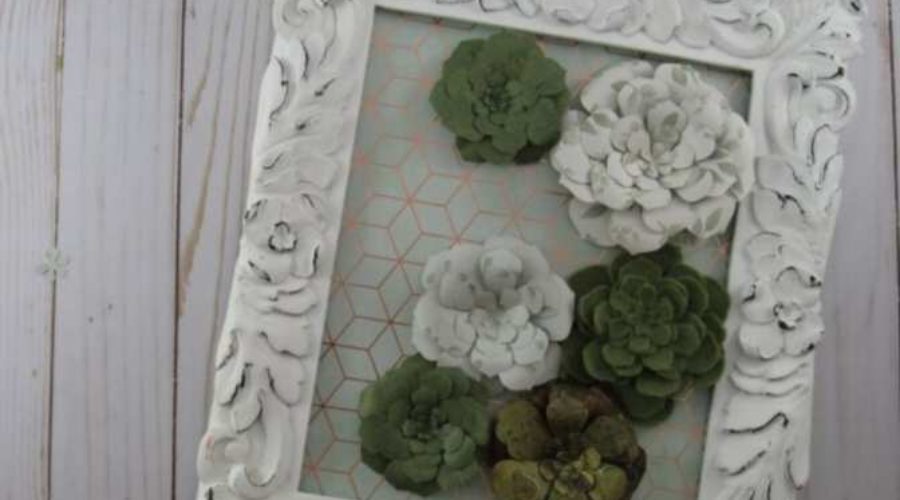
Framed Paper Flower Succulents
How to Make Paper Flower Succulents
Use your Cricut Explore to Make Paper Flower Succulents

Creating paper flower succulents using your Cricut Explore Air is so much easier than it looks. As a matter of a fact, this is a beginner certified project and a great way to fall in love with your Cricut machine if you’re just getting started crafting with it.
Check out my complete video tutorial!

For this project, I cut three different materials. Cricut Felt from the Spring Sampler, Printed Cardstock and Printed Paper. I wanted to see if you could make great succulents using almost any material that you have on hand and you can!
This project uses just one succulent image from the Cricut Design Space image library, so you don’t have to learn how to put together multiple flowers. By using different materials and different image sizes, the succulents look unique and beautiful but they’re still super easy!
Like this project? Check out our library of Craft Projects!

If you don’t have time to watch the video tutorial, then take these easy steps to make Paper Flower Succulents:
- Choose one of the 3D succulent images in Cricut design space.
- Make different sizes of the succulent image – Mine ranged from 2.5″ – 4.5″
- Curl the leaves using a pencil to give the plant dimension.
- Glue the petals together with the largest flower petals on the bottom and working your way to the smallest on top. I used a mini detail glue gun.
- Attach the succulents to a frame, box, or vase.
Love making projects like this one? We do too! Don’t craft alone. Join us for our LIVE Chat and Craft Sessions. Sign up for our Facebook Group : Crafting is My Therapy where we share projects and support our love of crafting. You can join the email list so you won’t miss a LIVE event.
Love what you see? Please share it with a friend!


