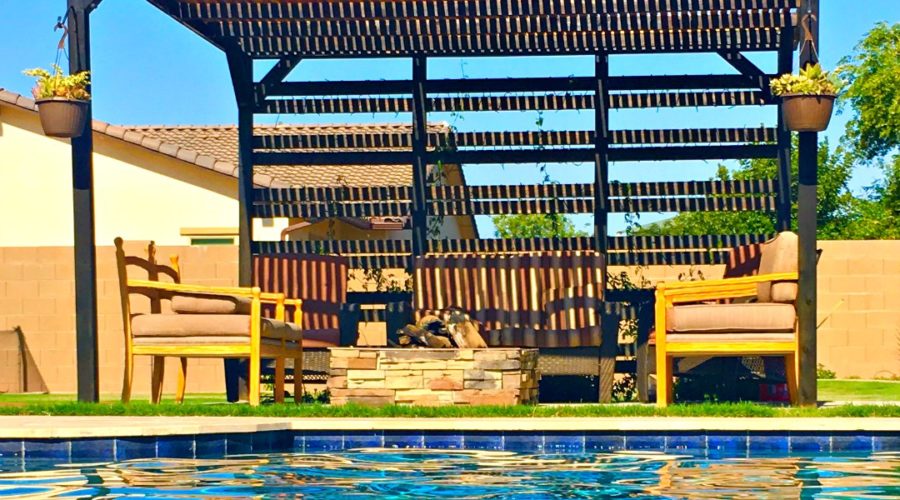
Pergola with a Modern Twist Tutorial

How to Build a Backyard Pergola – Step By Step
A pergola offers shade and some furniture protection without the hassle of engineering the roof for run-off. Pergola patios are also budget friendly, and infinitely customizable. Your pergola can be built to fit your space and personal style.
Living where it’s hot and sunny, the goals for our pergola included:
- Nearly full coverage sun protection.
- A modern look
- An outdoor room for a fire pit
- A trellis wall to increase the sun protection.

We designed this pergola to fit these goals, and in the process, created a structure that is easy to build. Typical pergolas are constructed by placing the roof slats into the crossbeams by notching each of the slats. This looks great, but is time consuming. With our pergola, we didn’t want the roof slats visible above the crossbeams. Our design nests the roof slats on top of the crossbeams, flush with the outer frame of the pergola.
On with the tutorial!
Step 1: For this project, we constructed a concrete pad. Pergolas need to be stable, so you want a solid foundation of either concrete, pavers or other stable surface. Alternatively, you can set the pergola using footers, but we won’t be covering that here.
Once you have your stable surface, mark and place the four corner uprights. We used 4”x4” treated redwood. Treated redwood is pricier than untreated, but it last longer and handles inclement weather better than untreated lumber.
Attach the 4- steel post base anchors to the concrete using a hammer drill and a concrete anchor.
Step 2: The outer frame is constructed using 4- 2”x6” redwood. Our pergola is 12’x12’, so we used 12’ 2”x6” lumber. Adjust accordingly.
Attach the 2”x6” to the uprights using 2- 6”x1/2” lag bolts per corner.

Step 3: We placed 2”x4” redwood cross beams every 24 inches across the top, attaching them to the interior of the uprights (flush with the bottom of the upright) using grabber screws.
These cross beams will support our roof.

Step 4: For added support and because we just love the look, we added diagonal braces to the top corners using 4”x4” posts cut at an angle to fit the uprights. We attached the diagonal braces with 6”x1/2” lag bolts.
Step 5: For the back wall we added two additional 4”x4” posts to secure our wall beams to. The wall beams are 2”x4” redwood. We laid the pattern for the boards on the ground prior to installing them, so that our pergola wall had the design we wanted. For a classic back wall, you could attach lattice sheets.

Step 6: At this point, we stained everything black. We wanted a two-toned wood pergola so we didn’t install the roof slats until after we had stained the rest of the frame.
Step 7: We wanted our roof slats to be as close together as possible without installing a solid roof. The closer your slats are together, the less sun penetration. Most pergolas space the roof slats between 1-4” apart, we opted to space ours ¾” apart.
We attached the roof slats by nailing them into the 2”x4” cross beams.

We love the pergola. The close roof slats provide even more sun protection than we had anticipated. By planting a climbing Ivy at the base of the back wall, we have additional sun protection in the mornings. We also love the more modern design.
Let us know what you think in the comments below. If you have any questions about how to design or construct your pergola, ask away! We’re happy to help.


