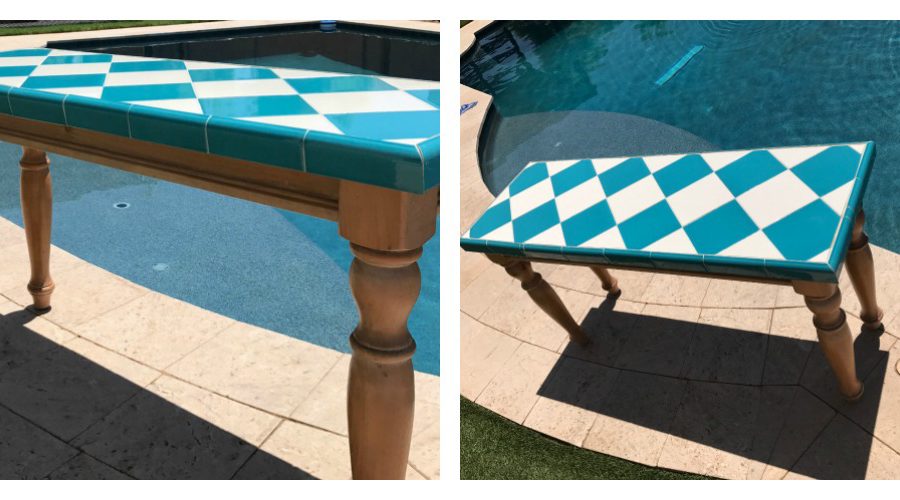
Tile Tabletop Project: Done in a Day

How to Tile a Tabletop and Design a Beautiful Table with Tile
A tile tabletop is the perfect afternoon project. It’s simple, fast and satisfying. It’s a nice project for a notice because it will make you feel accomplished and you only really need to learn one new skill—using the tile cutting saw.
If you’re a beginner, I suggest that you start by tiling a small tabletop. This is an old sofa table. Starting small allows you to play around with layouts and learn first-hand how to handle unusual cuts. Then, you can tackle tiling the bigger tabletop with confidence.

Before we start to tile the tabletop, let’s talk about tile saws.
1) Manual ceramic tile cutter: Costing around $30 dollars, these cutters score, then break the tile. Personally, I won’t ever use a manual ceramic tile cutter. The cuts can be jagged, tiles often break, and it adds unneeded frustration to your project. It’s the budget tile cutter, and can be attractive especially if your project is small but it’s worth it to rent the wet tile saw for the same price rather than owning a cutter that doesn’t work well.
2) Wet tile saw: Priced at around $80 and up, a wet tile saw makes precise cuts. It’s easy to use, and opens a world of possibilities unavailable when using the manual cutter. A wet tile saw allows you to design intricate layouts, tile insets and other exciting designs. This saw can be rented from a local home improvement store for around $30 per day.
Now that you’ve picked your ceramic tile cutter, you will also need:
• Tile—enough to cover the tabletop with about 10% to spare for broken tiles and bad cuts.
• Adhesive. We use the adhesive dispensed using a caulking gun. It’s easier to work with than thin-set adhesive on small surfaces.
• Non-sanded ceramic tile grout. Again, we use the type dispensed using a caulking gun. The grout comes in a variety of colors.
• A soft large sponge
Step 1: Begin by laying out the tile on the table. You can keep it simple, or you can get creative. Once you have your design, mark the center of the table and work your way out from the center as you lay the tile.

Step 2: Adhere the tile to the table using the adhesive. For a table top, leave small (1/8”) gaps between tiles for the grout.

Step 3: Once the tiles have set, it’s time to grout between the tiles. Small grout lines call for non-sanded tile grout. Sanded grout is for larger grout lines.
Step 4: Wipe the table with a damp sponge. This is how you “sand” the non-sanded grout.

My favorite part about any project is the story behind it. We’ve owned this sofa table for a while, and it’s been used and abused until cup rings now decorate the entire top. So, it’s needed a makeover for a long time. I love all the tile tabletops on Pinterest and wanted one of my own.
I was set on blue tiles (to go with my pool), but the home improvement stores tend to stock neutral colored ceramic tile. I loved the idea of beautiful mosaic tiles, which would have cost around $50 for the small table top. However, I always like to stop by the Habitat for Humanity store to see what’s new before I start a project. These stores sell building supply donations, so you never know what you’re going to find. I always start with the new arrivals. In this case, I found boxes of brand new blue tiles for $10 each, and another box of the off-white tiles for the same price. Boxes of tile normally run between $40-80 depending on the style, so these stores offer deep discounts.
All in, we paid $18 for the supplies to tile the tabletop. It took an afternoon to complete.
Do you have a project with a great story? We’d love to hear it in the comments below.


