Tub to Walk-in Shower Conversion : Bathroom Makeover
Complete Bathroom Remodel
Tub to Shower Conversion
Road Ah, tubs. We have a love affair with huge soaking tubs with jets, tubs with beautiful clawed feet. No one likes to think about the dark side of tubs, the small acrylic finish shower tub combos. These sad little tubs are still installed in practically every non-custom home being built today. Generally, I champion multi-use products wholeheartedly, but the acrylic shower-tub combo is multi-problem. They have zero style. They’re difficult to clean, and too small to be enjoyed as a tub. They’re difficult to step in and out of when showering, and children tend to forget to keep the liner in the tub, so you’re always mopping up water.


Replacing the acrylic shower-tub combo with a walk-in shower has always been a top priority on our home improvement list. While this isn’t the best project for a beginning do-it-yourself-er, it is possible to give your bathroom the ultimate makeover for under $3,000. This is a significant savings over the average small bathroom remodel cost in 2017 of $9,371. Even if you only feel comfortable handling certain aspects of the remodel, opting to hire-out for some items, you should see significant savings.
Ready for a Big Project? Here’s our tips on how to get through it with your Sanity in tact!
It is possible to remodel a bathroom for $3,000 if you do-it-yourself Click To Tweet
Here’s how we tacked our shower-tub combo to walk-in shower conversion:
- Demo Day:
We removed the fiberglass tub. This is one of the most difficult steps because the bathrooms are often built around the tub enclosure. Turn the water off to the house before starting. Use a saws-all to cut the tub into pieces. Go slow, and be careful not to cut any of the plumbing in the wall. Pull the tub out in pieces, using gloves because the fiberglass/acrylic is very sharp. This job is messy.
- Install the shower base:
The easiest, least expensive option for a shower base is to purchase a one-piece shower base. The pros include: it’s cleaner, and the drain will be level without any extra work. The cons include: what you buy is what you get. You can’t change the color and you can’t tile it. You will also need to do some minor plumbing in the floor of your bathroom to move the combo drain to the spot where the shower pan drains.
Want to see what we’re up to now? Follow us on Instagram!
- Install light fixture:
If your tub combo is like ours, there’s no light fixture above the tub. Since we wanted light in our shower, we needed to install a light fixture. We had to pull the power from the light fixture above the sink. We did this by cutting the wall and running the electrical wires from the sink light fixture to the shower. We installed a waterproof can-light fixture in the shower, giving ample lighting in the shower.
- Pick out your shower door:
Home improvement stores carry standard sizes in shower doors, or you can have a shower door made to order. We opted for the second option because we wanted a bigger, heavier door. Once you’ve decided what you want, you will know the size of the opening you need for the door.
- Frame in the Shower:
We framed in the wall between the toilet and shower, leaving the needed opening for the shower door.
- Replace drywall:
There’s no drywall installed behind these combo tubs. Therefore, you will need to replace the drywall with waterproof drywall that is specifically designed for showers. We also replaced the drywall we had cut out to pull the electric to the shower.
- Tile the Shower:
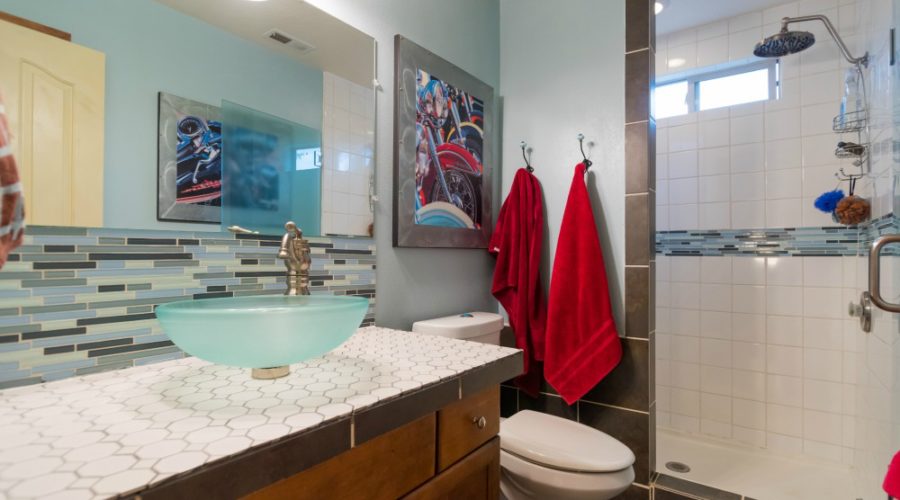
Because we used a preformed shower base in white, I wanted white tile subway tile. There are so many options in tile, that you can have a lot of fun picking it out. Smaller showers look nice with smaller tile, but large tiles are a cinch to install and require only a few cuts. We added a blue glass section to add interest to the all-white shower. 
That’s it for installing a walk-in shower. This was a complete bathroom remodel. If you want to see how we tiled the floor, replaced the toilet, or installed the new sink, check out our other posts on the bathroom makeover.
Thanks to JeremiahBarberPhotography.com for the great “after” photos.
If you have any questions, please ask in the comments below. 


